In the following photos and descriptions, we will illustrate a portion of the labor intensive process required to plan, create and install a life-size bronze figurative national monument.
The USCT National Monument located in Nashville, Tennessee, is the first figurative monument of the USCT ever placed in a National Cemetery. The monument has been documented and archived by The Smithsonian Institute. National Cemeteries are established by the National Cemetery Administration, Department of Veterans Affairs, Washington, D.C., and generally referred to as Veterans Cemeteries.
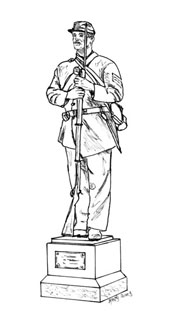
| This particular project was implemented through community support and contributions. Various sketches were created by Mr. Butler to illustrate the proposed monument in order to facilitate fund raising by the client committee. |
|
| Once artist sketches are approved, some projects require a maquette be created in clay. This project did not require a maquette and went directly to full sculpture creation due to time restraints. However, after the monument was completed, a highly detailed maquette was created in clay as a basis for the sale of miniature bronze editions of the full size memorial. |
|
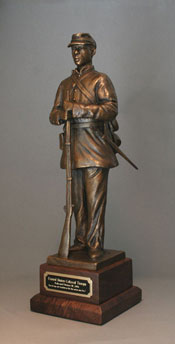
The miniature bronze edition, complete with dedication plaque and beveled wood base. Total height 15.5” with weight of 11 pounds. These editions are for sale to the public to commemorate the national monument. |
|
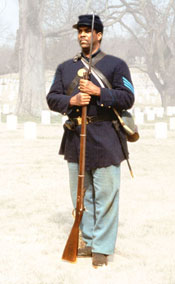
| The client had already selected their model and pose for the project as illustrated in this photograph. The model is a USCT re-enactor of Civil War ceremonies. Mr. Butler took approximately 150 reference photos of the model from all angles and detailed measurements. |
|
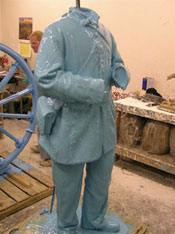
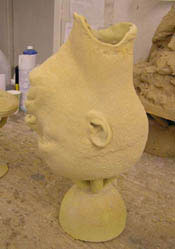
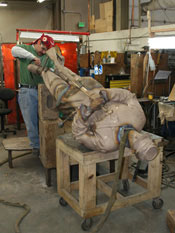
| This photo illustrates the first phase of making the mold for lost wax bronze casting. The artist fabrication minus the head, hands and various other accessories, has been coated in a thin layer of liquid rubber which captures every minute detail. Accessories have been removed to facilitate the fabrication process and also providing for greater authenticity of overall detail. |
|
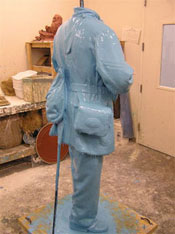
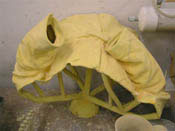
A second and third layer of liquid rubber has been applied at this point. Small details and curves are beginning to disappear behind the rubber, but the layers must be approximately ½” thick when completed.
Notice that several accessories are also missing from this view including part of one shoulder strap. When the sculpture is completed, there will be no backfill in this area making for a more realistic look. In the industry, we call this “negative space”. |
|
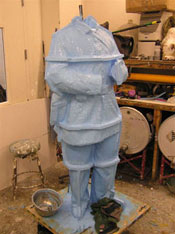
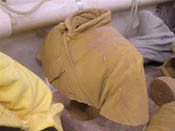
| Foundry workers have determined where they want to separate the multiple sections of rubber into individual mold sections. Rectangular bars of solid rubber have been attached at these locations. |
|
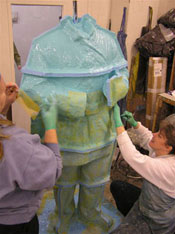
Prior to the last layer of rubber being applied, a reinforcing fabric mesh is painted into place with more liquid rubber. This mesh will help reinforce the fragile mold parts when they are separated.
The next step will be applying a final layer of rubber. Once the rubber is dry, plaster support shells are made for each mold section then the rubber is cut apart at the joint bars and removed from the artist fabrication. |
|
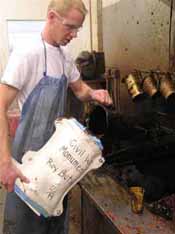
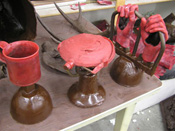
| The rubber mold parts have been cut apart and bolted inside their individual plaster support shells. Liquid wax is now poured into the individual molds, slush cast, and built up in several layers. Often, layers are made of different strengths of wax for small or complex areas of the mold. These types of layers are represented in the cap and collar photos illustrated below. |
|
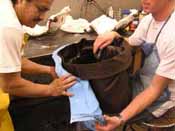
| Workers are carefully removing a cooled wax part from its mold. The wax is specially made for foundry applications since is has to withstand extensive handling but be soft enough to be carved or “chased”, cooled and reheated many times to correct minor imperfections. Chasing is the process where all imperfections are corrected using dental tools, heating rods and dryers. |
|
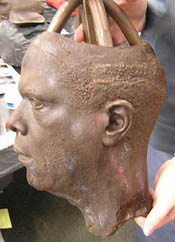
| This is the wax head of the artist fabrication. The top has been cut off during the mold making process to facilitate ceramic slurry and molten bronze flow during those processes to follow. Wax rods or “sprues”, have been attached by workers. |
|
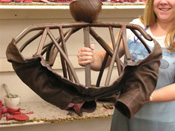
| Photo illustrating part of the wax arm sections that have to be cast separately due to their complexity. Note the 15 wax sprues and funnel required just to make this one part in bronze. Each one of the components has to be hand fabricated. |
|
| Wax drinking cup, canteen and hands, already sprued and ready for the ceramic slurry process. Two colors of wax are illustrated in photograph. One color has more tensile strength than the other to withstand greater forces during the slurry and molten bronze process to follow. |
|
| The wax cap is illustrated here minus the brim which is cast separate due to it being a more fragile wax part with a very thin cross section thickness. |
|
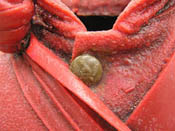
| Here is a close up of the wax collar area and a separate button made of a different color wax. The artist button fabrications were cast separate to retain all fine detail. The wax used for the buttons is formulated to capture very fine detail but still retain rigidity to withstand fabrication processes. The separate wax components have been bonded together to form one unit. |
|
| Several wax components have been bonded together to form one massive section of the trousers. A worker is chasing the completed part to remove all imperfections. |
|
| The shell is made by dipping the wax part into a slurry of liquefied silica solution then covering it with fine grains of silica. This process is repeated many times until a sufficient thickness is created. Each dipping is air dried before the next layer is created. |
|
| The wax head has been coated with several layers of ceramic, dried, and is now ready for molten bronze pouring. |
|
| This photo illustrates the wax arm section viewed in a previous photo, totally coated in ceramic. |
|
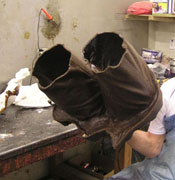
| Here the wax shoulder sections have been joined, chased, and coated as one unit in ceramic slurry. |
|
| This large wax torso section has been coated in ceramic with a higher tensile strength. |
|
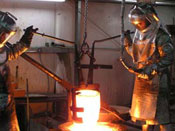
| Workers are melting bronze ingots to 2,100 degrees in preparation for pouring into ceramic shells. Fire and heat retarded suits must be worn at all times during this part of the casting process. |
|
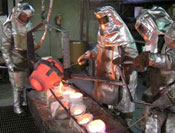
| In another department, the ceramic shells with encapsulated wax parts have been placed in an autoclave furnace and all wax has been burned out, leaving a perfect impression in the ceramic. Workers are now pouring liquid bronze into the hollow ceramic shells, replacing the void from the original wax part. |
|
| Bronze parts have cooled sufficiently for workers to break off ceramic shell material. If you look carefully, you will see a full bronze head in the lower right of the photo. |
|
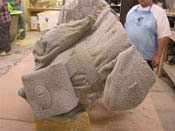
| A portion of the raw bronze front torso from the USCT sculpture is beginning to emerge from its ceramic shell. All ceramic has to be removed from the new part before it is delivered to the metal chasing craftsmen for assembly. Newly poured raw bronze actually appears brown grey in color before it is sandblasted. |
|
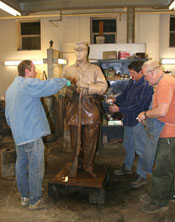
| Major sections of the bronze body have been welded together and the figure begins to take shape. |
|
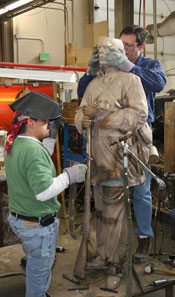
Workers are beginning to weld on accessories to the body and aligning the head. Alignments and measurements are critical at this stage of assembly to assure complete accuracy and compliance to artist original sculpture.
Often during the fabrication process of wax and bronze pouring, individual components will slightly warp and these pieces have to be reformed to fit accurately. The sculpture is basically a highly complex metal jigsaw puzzle. |
|
| Worker is welding on hardware where completed sculpture will attach to granite pedestal during on-site installation. |
|
| Close up detail showing all the handwork required for proper fitting, soldiering and chasing the metal components. Extensive metal chasing assures that details and textures of the original artist fabrication will be preserved. |
|
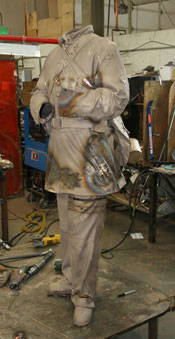
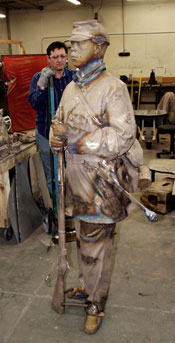
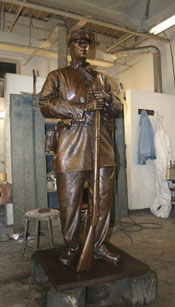
| The fully assembled raw bronze is standing upright for the first time! It will now receive final inspection by the foundry manager and artist before a base plate is welded in place. Any small alterations or alignments must be completed at this time. |
|
Final inspection, minor adjustments, alignments and base plate attachment have been completed. The entire assembly has been sandblasted to remove all weld marks which allows the artist to visually see any further areas of the metal that need to be reworked. Often, during this inspection process, minor imperfections have to be reworked and sandblasted several times.
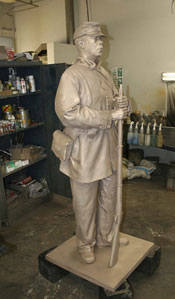
The artist approved raw bronze sculpture has received final sandblasting and carefully relocated to the patina finishing room. The sculpture can not be touched by human hands between sandblasting and beginning of the patina process because oils in our skin will react with the chemicals and leave spots in the final finish.
Entire sculpture has been heated with blow torches and ready for chemical patina finishing. |
|
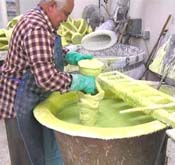
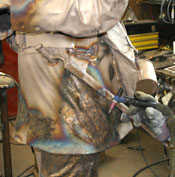
| Workers begin the final stage of patination, which is the chemical coloring of the bronze surface. The bronze surface is heated with acetylene torches and the chemicals are applied. Many different chemicals and acids can make up the artist specified final finish, which are applied with sprays, brushes, hand rubbing with steel wool pads. |
|
| All patina solutions have been hand applied and a coat of hot wax has been blow torched to seal the surface. The completed sculpture will cool overnight and be hand burnished the next morning. |
|
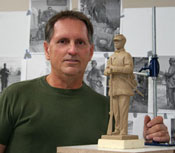
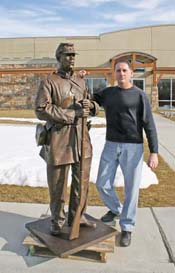
| Mr. Butler and the completed bronze sculpture are displayed in front of the foundry just hours before it will be crated and shipped 2,500 miles to Tennessee. |
|
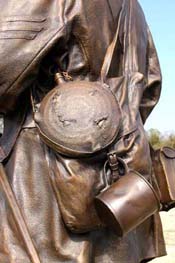
| This close up photo illustrates a section of high realism detail Mr. Butler is noted for creating. Realism is in the details, even down to the torn and textured burlap covering of the canteen, authentic time worn folds in the haversack and battlefield scar dents created in the metal drinking cup. |
|
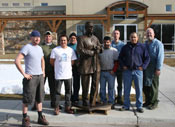
| Craftsmen at the foundry are very dedicated and proud of their skills and often request photos with completed sculptures that are of great significance to them. Here are eight of the approximately thirty men and women that were required to complete the USCT sculpture. |
|
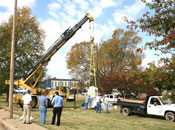
The average adult life-size bronze sculpture can weigh 450 pounds. Granite pedestals and bases can weigh many tons per slab. Often, large cranes and numerous personnel are required for a single monument installation as for the American Legion National Monument in Arkansas.
SPECIAL NOTE: No installation photos are available for the USCT project. |
|
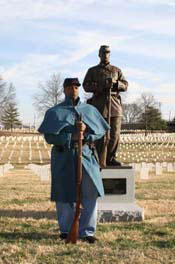
| Model, Mr. Bill Radcliffe and the completed 9’ high monument stand guard over 2,133 Civil War servicemen. |
|
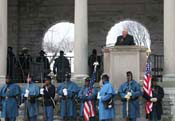
| The monument was dedicated and accepted, February 18, 2006, by Mr. William Tuerk, Under Secretary of the National Cemetery Administration, Department of Veterans Affairs, Washington, D.C. |
|
| The dedication ceremonies were attended by Civil War re-enactors and guests from approximately ten states. |
|
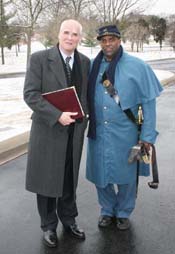
| Mr. William Tuerk, Under Secretary of the National Cemetery Administration, Department of Veterans Affairs and Mr. Bill Radcliffe, USCT model for the national monument, at the conclusion of dedication ceremonies. |
|